
Adventure Force Enforcer handle replacement for installing microswitch triggers.
By Gunner_Leo
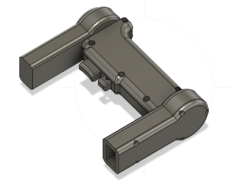
A replacement handle I built for the Adventure Force Enforcer to give it a rev trigger and to mount micro switches in the handle.
You only need the top and bottom handle mounts if you are going to cut the blasters handle mounts off, otherwise you can just cut the middle section of the Enforcer handle and glue this replacement right in.
The screws I used are M2.6×10 which is the same size as a standard nerf screw so you can use those if you have them on hand. And the micro switches use M2.6x 16 screws to hold them in place.
The rev trigger switch requires a micro switch with a lever on it and the primary trigger switch requires a micro switch without a lever on it.
There is a recess in the primary trigger to place a small spring. But there is not one for the rev trigger. I just placed a small piece of spring in-between the lever of the switch and the switch itself.
The print settings shouldn’t matter too much. You only need support touching the build plate and at least 2 walls and 4 top and bottom layers, The stl files are already in their intended print orientation. I printed it in PLA.
For mounting the handle I used Permatex Two Part Plastic Welder, just make sure to rough down and sand the area you want to apply the glue to.
May 20, 2024 at 04:00AM
via Thingiverse – Newest Things https://ift.tt/LcpVqjA

Lascia un commento